|
|
|||||||||||||||||||||||||||||||||||||||||||||||||||||||||||||||||||||||||||||||||||||||||||||||||||
|
|
|||||||||||||||||||||||||||||||||||||||||||||||||||||||||||||||||||||||||||||||||||||||||||||||||||
 |
 |
 |
|||||||||||||||||||||||||||||||||||||||||||||||||||||||||||||||||||||||||||||||||||||||||||||||||
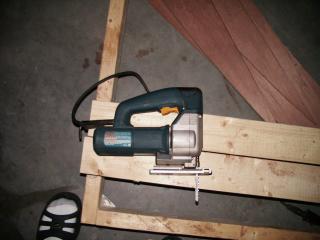
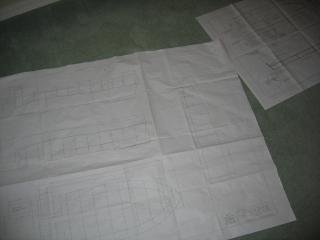
| It all started with a stack of plywood sheets. I used Meranti BS1088 (Marine Grade Plywood). | Most of the cutting with this jigsaw. I went through a least 6 anti-splinter blades. | Before any cutting was done, I studied the plans and then mapped them onto the plywood. | |||||||||||||||||||||||||||||||||||||||||||||||||||||||||||||||||||||||||||||||||||||||||||||||||
 |
 |
||||||||||||||||||||||||||||||||||||||||||||||||||||||||||||||||||||||||||||||||||||||||||||||||||
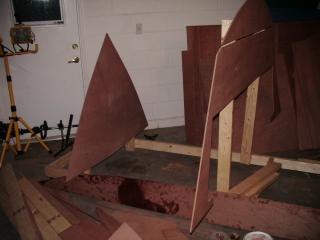
| Here the transom is shown cut. Using C-clamps I checked to ensure that the transom and clamping boards matched up. | The stringers are shown cut as well, many pieces make up each stringer. Not only are they laminated, but there are 3 to 4 sections per face. It was somewhat of a challenge to correctly follow the nesting diagram in the plans to end up with sets stringers. With time and patience this was accomplished. Later these will be glued together with epoxy. The end result will be 3/4" thick stringers (2 layers of 3/8" plywood). | After each frame was cut (or in some cases a mold was necessary), they are mounted upright on the strongback. | |||||||||||||||||||||||||||||||||||||||||||||||||||||||||||||||||||||||||||||||||||||||||||||||||
 |
|||||||||||||||||||||||||||||||||||||||||||||||||||||||||||||||||||||||||||||||||||||||||||||||||||
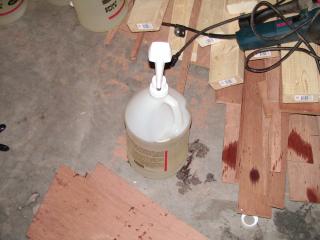
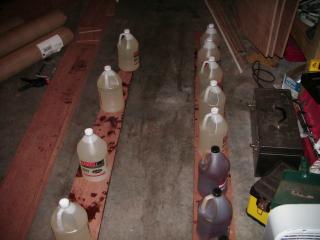
| Next I decided to glue the transom to theits clamping boards with epoxy. These pumps make mixing the resin and hardener virtually fool proof. 2 squirts resin & 1 squirt hardener. | I glued one clamping board at a time. Notice the sheet of plastic on the floor, this is critical if you have any epoxy that runs out of cracks. From the few drops of epoxy that I didn't clean up off the floor I imagine it would be nearly impossible to remove a piece of wood that you accidentally glued to your floor without destroying the wood. The gallon jugs of epoxy served as weights also. | Here is a closeup shot of the 3 layers that make up the transom. Since this was the first part that I used epoxy with I probably used it a little bit too liberally, causing a fair amount to ooze out of the edges. On the other hand, these pieces are certainly not going to break loose, and since this is the transom I am more than happy with the end result. | |||||||||||||||||||||||||||||||||||||||||||||||||||||||||||||||||||||||||||||||||||||||||||||||||
 |
 |
 |
|||||||||||||||||||||||||||||||||||||||||||||||||||||||||||||||||||||||||||||||||||||||||||||||||
| The "G" frame is wider than a sheet of plywood. Here I decided to fiberglass the two equal sections that make up the frame | Just another shot showing the fiberglass tape. This was regular woven tape, not biaxial which arrived later on. | The final seem after it dried. I was highly impressed with how rigid it had become, the frame felt like a single piece of wood, and this was after fiberglassing only 1 side of the seem. After the epoxy cured I flipped the frame and taped the opposite side. When the two side were cured the strength of the epoxy + fiberglass was beyond my expectations. Unbelievable. | |||||||||||||||||||||||||||||||||||||||||||||||||||||||||||||||||||||||||||||||||||||||||||||||||
 |
 |
 |
|||||||||||||||||||||||||||||||||||||||||||||||||||||||||||||||||||||||||||||||||||||||||||||||||
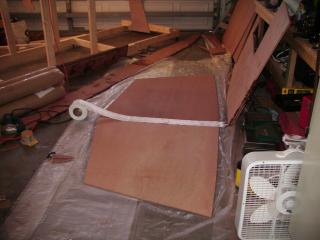
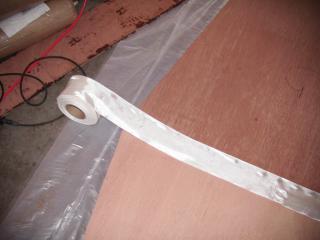
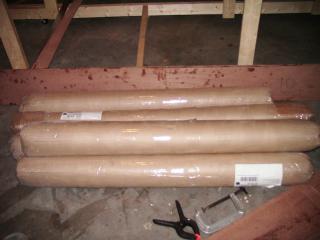
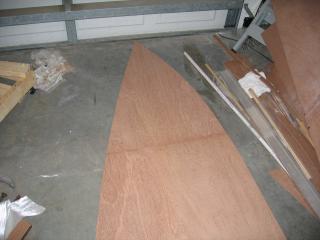
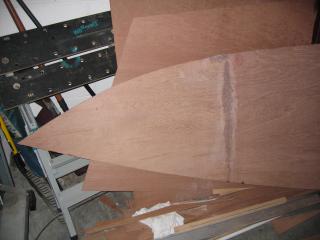
| As I said earlier, the stringers had to be laminated using many pieces per side. This was not accomplished all at once. It was very difficult to mate all of a stringers pieces in a single glue session. I decided that it would be best to work smaller sections that were much more manageable. In the end this proved to be worth the patience. Again, I used full jugs of resin/hardener for weight. | The rolls of fiberglass fabric have arrived. They're not needed yet, but glad to have them waiting. I also received biaxial tape so I'll use it for splicing large panels. | The bottom panels are made up of 3 pieces, measuring around 19 feet and required splicing. After fiberglassing the G frame with regular tape and being so impressed with the strength, I decided that I would only glass the inside of the bottom panels. I used biaxial tape for this. I made sure to allow plenty of excess epoxy run through the seam. Taping only the inside may result in a hull that is easier to fair in the end. We'll see. | |||||||||||||||||||||||||||||||||||||||||||||||||||||||||||||||||||||||||||||||||||||||||||||||||
 |
 |
 |
|||||||||||||||||||||||||||||||||||||||||||||||||||||||||||||||||||||||||||||||||||||||||||||||||
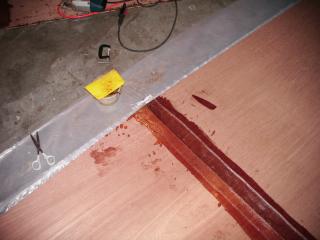
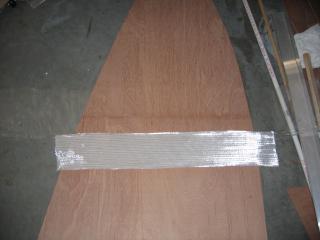
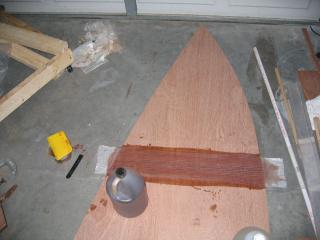
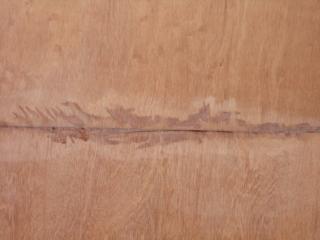
| Biaxial tape shown laying across the seam. | The tape is now wet with epoxy and shows clear. Once all of these seems are cured I will flip the panel over and sand off any glue that may have pooled up on the bottom. | Here is a seam with the epoxy sanded off. It now feels "seamless" to the touch. | |||||||||||||||||||||||||||||||||||||||||||||||||||||||||||||||||||||||||||||||||||||||||||||||||
 |
 |
 |
|||||||||||||||||||||||||||||||||||||||||||||||||||||||||||||||||||||||||||||||||||||||||||||||||
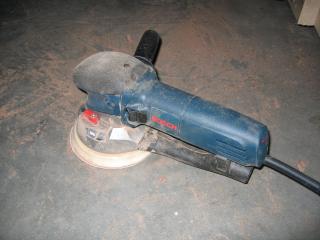
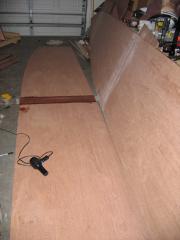
| Just a closeup of a sanded seam. | I have a Bosch random orbital sander (model# 1250DEVS). This has truly made the sanding a breeze. | One bottom panel is done, another being worked on. | |||||||||||||||||||||||||||||||||||||||||||||||||||||||||||||||||||||||||||||||||||||||||||||||||
|
|
|||||||||||||||||||||||||||||||||||||||||||||||||||||||||||||||||||||||||||||||||||||||||||||||||||
Copyright© 2004 - 2005 by Michael D'Amour. All rights reserved.